and the winner is….

I would like to thank everyone who submitted there suggestion, who took the time to think about it and to type it up.

.

.

.

.

And the winner is….

.

.

.

.

.

.

not so fast!   I want you to know how much I appreciate you help and support!

.

.

.

.

.

.

.

and..

.

.

.

.

.

.

.

Wait, don’t you want to see the prizes?  Of course you are.

.

.

.

.

A lucky winner will receive some gorgeous yarn

See I told you it’s pretty, yummy and gorgeous!  It’s Cascade Yarns 128 Superwash!

.

And another winner will receive a free crochet class of her choice.  So are you excited to find out who won what?  May be it is you, who knows.

.

.

.

And the winner is

.

.

.

Drum roll

.

.

.

After very careful consideration, I’ve decided that every person who submitted a consideration deserves a prize!!!

Congratulations to Rochelle, Hannah and Tonia!!

Rochelle and Tonia, you both won a class of your choice!!  You can redeem it at any time for any class!

Hannah, you won a skein of that gorgeous yarn, up there!!!


Rochelle, Tonia and Hannah, how excited are you?  And everyone else start kicking yourself ;), and writing up your suggestions.  A new contest might be announced soon.

Suggestions Giveaway

Thank you everyone for submitted your ideas for crochet classes. I received some very great suggestion and I am already working on adding more classes.

Just because I can 😀 I want to keep you waiting a little longer! Stay tuned for price announcements and winners.

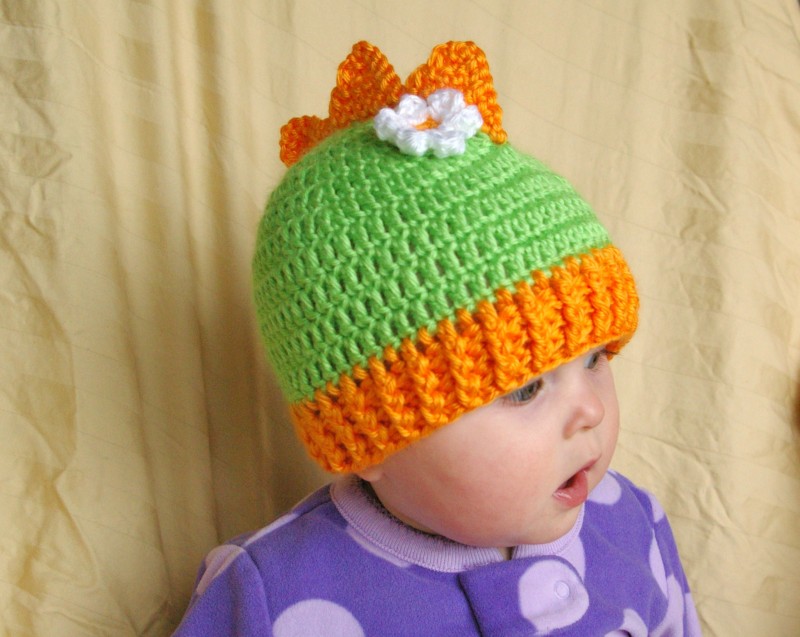
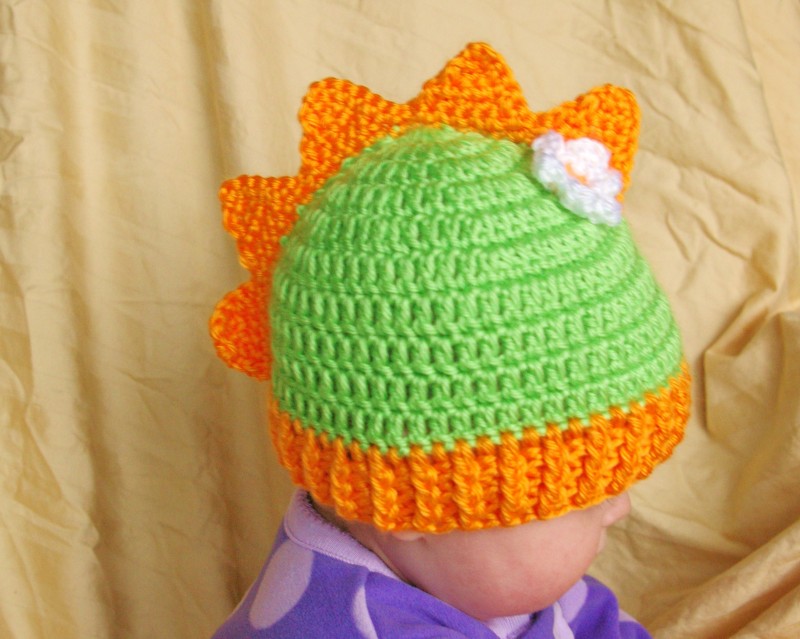
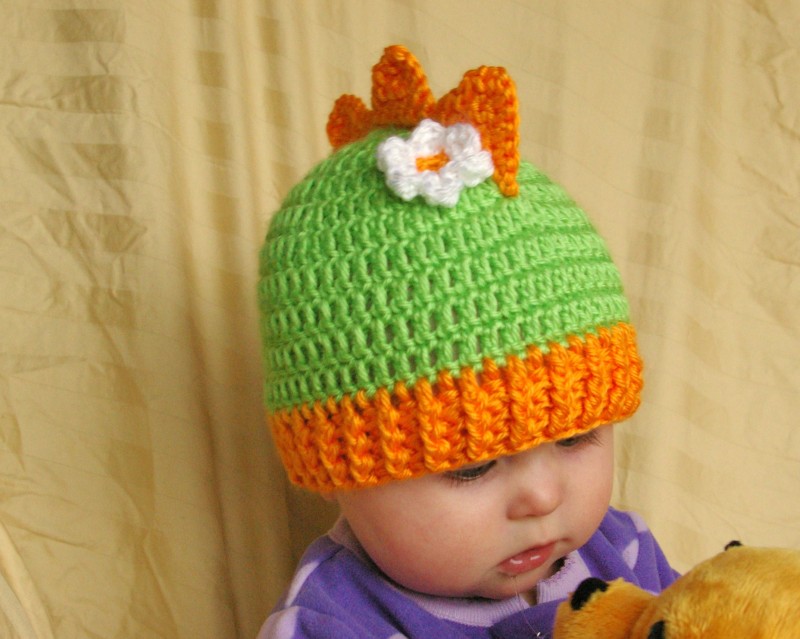
Dino Hat


First dinosaur hat that does not require sewing!  It’s worked from the top down, then the spikes are crocheted over the hat.

It’s a great unisex hat that will be a great gift for a new baby. It is also an awesome hat for a dinosaur fan of any age!

A cute little flower (instructions are included) can be added to customize the hat for a girl.

Finished measurements: 13 (15½, 18, 20½, 23)” circumference to fit 3-9 months (9-18 months, child, teen/adult S, adult M) with 1-2″ of negative ease.

Yarn: Light worsted weight yarn.

Shown: Caron Simply Soft (100% acrylic; 7 oz/198 g/366 yds/334m): lime green (MC), 150 (160, 170, 185, 200) yds; mango (CC1), 25 yds; white (CC2), 10 yds.

Hook: US G/6 (4.25mm). Adjust hook size if necessary to obtain correct gauge.

Notions: two removable stitch markers (M), yarn needle.

Gauge: 16 sts and 8 rows = 4″ in double crochet. To save time, check your gauge.

$3.50

This pattern is copyrighted by Anastasia Popova, 2011. You may not give away or sell copies of this pattern. This pattern may not be reproduced in part or in whole without the designer’s permission. You may make copies of the pattern for personal use. Copyright does not restrict your right to sell finished items made using this pattern.


New Classes and Prizes

I’ve been asked many times to add some crochet classes on weekends.  It took me sometime to get it done, but I did it!   Some new classes are now offered on Saturday and Sunday.  Topics include some beginner classes, like Crochet 101, Crochet 102 and how to crochet a hat without a pattern or ever checking your gauge, learn how to change colors; some intermediate classes, how to read charts, crochet cables, or make crochet socks.  I hope you like them.

Days and times are not set in stone, let me know if other time will work better for you, and if it earlier enough I might be able to switch some things around.

To see details about classes and to register, please click  Crochet Classes in the menu, or here.

If there is a topic that interests you, please feel free to suggest it!  Even better, suggest a topic and you will be entered to win some gorgeous yarn and classes.  To enter the “contest” please leave a comment below.  I have already received few email with suggestions, they are also entered to win.  The deadline is March 31.

Brianna

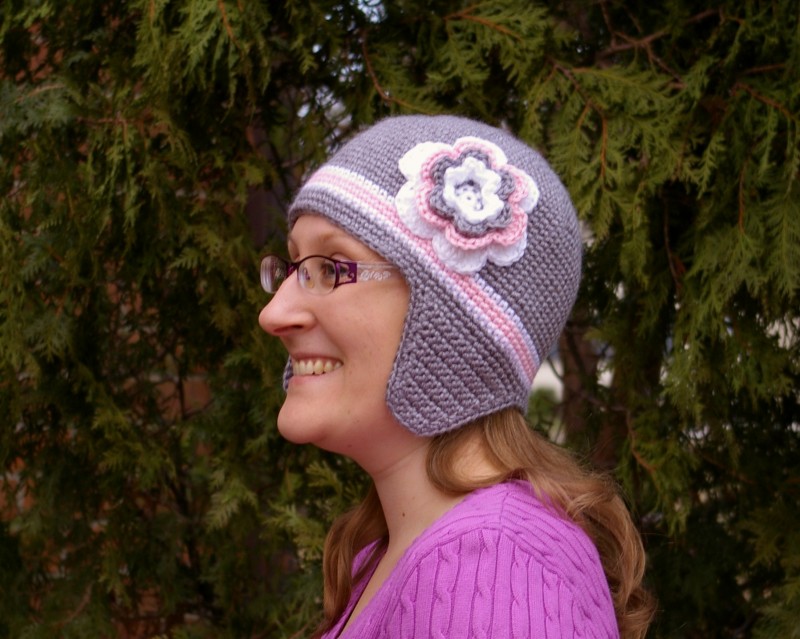
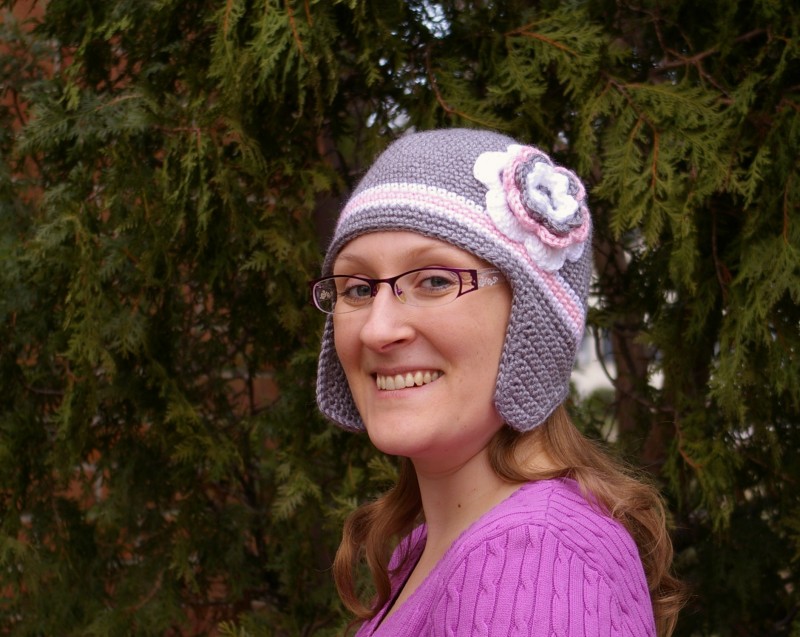
When Baby Brie grows up she will wear this!

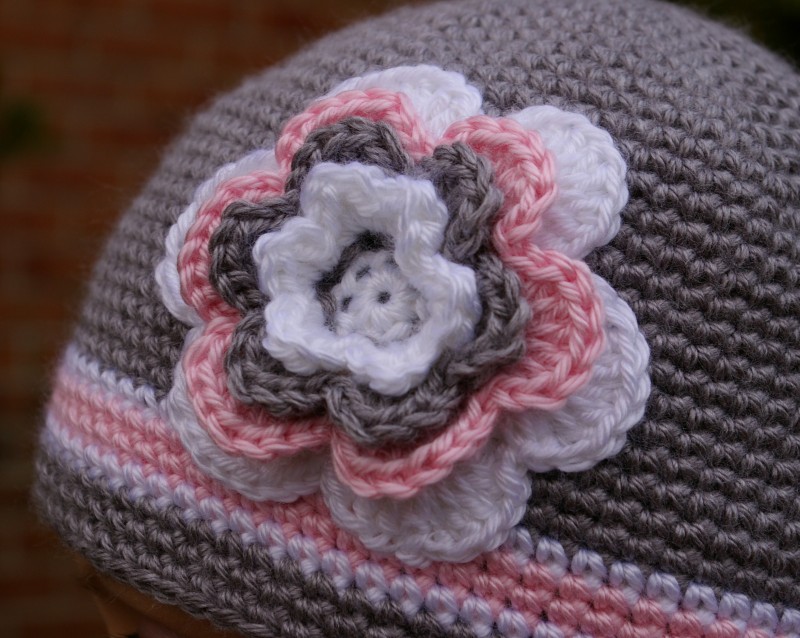
Brianna is a grown up version of my Baby Brie hat. It is a simple hat with earflaps and a huge flower. The hat is worked in rounds from the top down. Flower is made separately and sewn on afterwards. Directions are given to make flower smaller.

Finished Size: 16½ (18, 19½, 21, 22½)” circumference to fit average toddler (child, teen, adult S/M, adult L) with ½-1½” negative ease.
Head circumference 17-18 (18½-19½, 20-21, 21½-22½, 23-24)”.
Yarn: Light worsted weight
Shown: Caron Simply Soft (100% acrylic; 7 oz/198 g/366 yds/334m): gray (MC), 150 (160, 170, 185, 200) yds; white (CC1), 25 yds; pink (CC2), 25 yds.
Hook: US G/6 (4.50 mm). Adjust hook size if necessary to obtain correct gauge.
Notions: removable stitch marker (M), yarn needle
Gauge: 16 sts and 18 rows = 4″ in sc. To save time, check your gauge.

$3.50


This pattern is copyrighted by Anastasia Popova, 2011. You may not give away or sell copies of this pattern. This pattern may not be reproduced in part or in whole without the designer’s permission. You may make copies of the pattern for personal use. Copyright does not restrict your right to sell finished items made using this pattern.

Crochet Baby Mittens Pattern

Every little explorer needs to keep their hands warm and cozy without sacrificing mobility. This crochet pattern for baby mittens was designed for little Brianna to match her Baby Brie hat. They would look great in many color combinations or in solid yarn. For very little ones thumbs can be omitted.
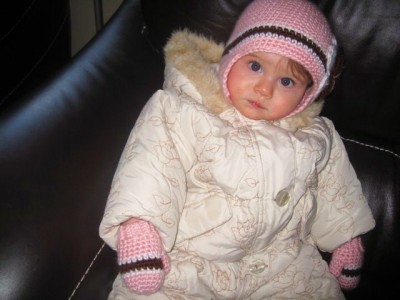
Last updated: 3/17/13

Size: 3-9 months. The size can be easily adjusted to be bigger or smaller.

Yarn: light worsted weight yarn.

Shown in Caron Simply Soft in pink (MC), white (CC1) and chocolate (CC2).

Hook: size G/6 (4.25 mm or 4.50 mm).

Gauge: 16 sts and 18 rows = 4″ in sc. Gauge is not crucial, however find balance between too tight gauge that restricts mobility and too loose gauge that allows cold air to get in or little fingers to poke through.

Notes:

  • The mitten is worked in rounds from fingertips to the wrist in rounds, the opening is created for the thumb (this can be skipped).  The ribbing is worked sideways.  A little sewing is required.  The thumb is worked into the thumb opening afterwards.
  • Most of the mitten is worked in continuous rounds without joining.  To eliminate “steps” of colors join with sl st (directions will be given) when working with stripes.  If only one color is used, work mitten in rounds without joining.
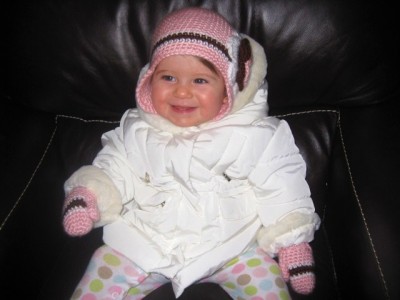
Mittens Pattern (make two)

This pattern has not been tech edited. If you find any mistakes, or something is not very clear please leave a comment  and I will do my best to correct it ASAP.

Rnd 1: With MC and smaller hook make an adjustable ring, ch 1 (does not count as a st), 6 sc in the ring.  Pull ring to close – 6 sc. Place stitch marker (M) in the last st made to keep truck of rows.

Rnd 2: 2 Sc in each st around – 12 sc.

Rnd 3: Sc in next st, 2 sc in next st – 18 sc.

Optional: for smaller mitten word Rnd 3 as follows: Sc in next 2 sts, 2 sc in next st.

Rnd 4, 5: Sc in each st around -18 sc. Sl st to next st.

Optional: for bigger mitten work Rnd 4 as follows: Sc in next 2 sts, 2 sc in next st.

Change to CC1.

Rnd 6: Ch 1 (counts as sc), sc in each st around, join with sl st to ch 1 – 18 sc.

Change to CC2. Work rnd 6 in CC2 two times.

Change to CC1. Work rnd 6 in CC1.

Change to MC.

Rnd 10: Ch 1 (counts as sc), sc in each st around, do NOT join – 18 sc.

Thumb opening

Optional: To omit thumb, work Rnd 10-12 as rnd 12 below.

For left mitten Rnd 11: Sc in next 2 st, ch 3, skip next 3 sts, sc in each st around – 18 sts.

For right mitten Rnd 11: Sc in next 13 sts, ch 3, skip next 3 sts, sc in each st around – 18 sts.

Rnd 12: Sc in each st around – 18 sc.

Repeat Rnd 12 one more time. Sl st in next st. Do not fasten off.

Ribbing

Note: Ribbing is worked sideways.  There are two steps in making ribbing.

  • Step 1: Work specified number of stitches in to the previous row
  • Step 2: Connect ribbing to the mitten

With bigger hook ch 5.

Row 1: Sc in 2nd ch from hook and each ch across – 4 sc.  To connect ribbing to the mitten sl st into next two sts on the mitten, they don’t count towards sts of the row.  Turn.

Row 2: Working through back loops only, sl st in each st across – 4 sl st.

Row 3: Ch 1 (does not count as a st), working through back loops only, sc in each st across – 4 sc.  Sl st twice to connect ribbing to the mitten.

Repeat Row 2 and 3 around the wrist of the mitten.  Fasten off leaving 5″ long tail.  With yarn needle sew the sides of the ribbing together.

Thumb

Join MC into the bottom right corner of the thump opening.

Set up rnd: Work 8 sc evenly spaced over sts of the thumb opening. Sc in the next 3 sts. Place stitch marker in the last st made.  The stitch marker is a new beginning of the round.

Rnd 1, 2: Sc in each st around – 8 sc.

Rnd 3: Sc2tog around – 4 sts.

Fasten off leaving 5″ long tail.  With yarn needle sew/close the hole on the top of the thumb neatly.
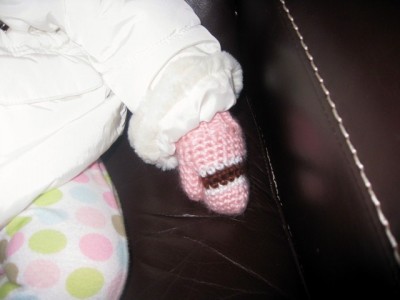
Copyright does not restrict your right to sell finished items made using this pattern.

Just had to share this with you

CrochetSpring2011TOC

Why? you ask. Do you see the two cute little girls wearing purple and green pants and tops? Well, they are MINE!!! (not the girls, the tops and pants are MINE). I am so excited to see the preview of the Spring issue of Interweave Crochet. I do get to see the written part of the pattern after editing by the publisher, but I don’t get to see pictures. I just have to wait like the rest of you. And it is so exciting to see how it all came out. Absolutely wonderful!!